Upgrading your Mercedes E63 with a high-performance downpipe can be one of the most rewarding modifications for both power gains and sound enhancement. The mercedes e63 downpipe install process, when done correctly, can transform your AMG into a more aggressive, responsive, and exhilarating machine. In this guide, we will walk through the benefits, installation process, and important considerations when upgrading your downpipe.
Why Upgrade to a Performance Downpipe?
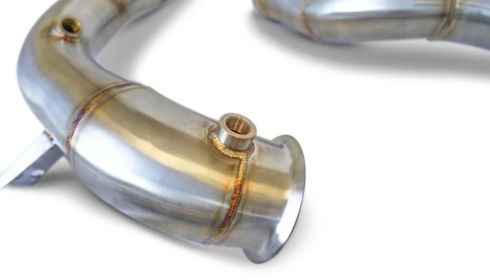
The downpipe is a critical part of your exhaust system that connects the turbochargers to the rest of the exhaust. In many stock configurations, it contains restrictive catalytic converters that limit exhaust flow. Upgrading to a high-flow downpipe reduces backpressure, allowing exhaust gases to exit more freely. This results in:
- Increased Horsepower and Torque – Better exhaust flow improves turbo efficiency, delivering noticeable gains in performance.
- Faster Turbo Spool – Reduced backpressure means your turbos respond quicker, providing a more immediate power boost.
- Enhanced Exhaust Sound – A performance downpipe can give your AMG a deeper, more aggressive tone.
- Improved Throttle Response – A smoother flow of exhaust gases allows your engine to breathe better and respond faster.
Preparation Before Installation
Before starting your downpipe installation, gather all the necessary tools and equipment:
- Ratchet set with extensions
- Torque wrench
- Jack stands or a hydraulic lift
- Penetrating oil (to loosen rusted bolts)
- Protective gloves and safety glasses
It’s also recommended to have new gaskets and hardware, as reusing old ones can lead to exhaust leaks.
Step-by-Step Installation Process
Step 1: Lift the Vehicle
Securely lift your Mercedes E63 using a hydraulic lift or high-quality jack stands. Make sure the car is stable before working underneath.
Step 2: Locate the Downpipe
The downpipe is connected directly to the turbochargers and leads toward the midsection of the exhaust. You’ll need to remove heat shields and covers to gain access.
Step 3: Disconnect Sensors
Carefully unplug the oxygen sensors (O2 sensors) from the factory downpipe. Mark their positions for reinstallation. This prevents errors during reassembly.
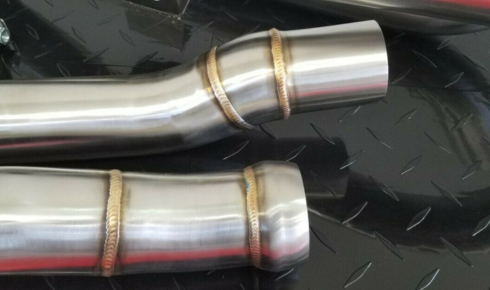
Step 4: Remove the Stock Downpipe
Loosen and remove the bolts connecting the downpipe to the turbo flange. Spray penetrating oil on stubborn bolts to avoid breakage. Then, unbolt the downpipe from the exhaust system and carefully remove it.
Step 5: Install the New Performance Downpipe
Position the new downpipe into place, ensuring it aligns perfectly with the turbo outlet and exhaust piping. Install new gaskets to ensure a leak-free seal.
Step 6: Reconnect Sensors and Components
Reinstall the O2 sensors in their correct positions. Reattach any heat shields or covers you removed earlier.
Step 7: Tighten and Torque
Use a torque wrench to tighten all bolts to the manufacturer’s recommended settings. This ensures proper sealing and prevents exhaust leaks.
Step 8: Lower and Test the Vehicle
Lower your Mercedes E63 and start the engine. Listen for exhaust leaks, rattles, or unusual noises. If everything sounds smooth, take a short test drive to confirm performance gains.
Post-Installation Considerations
- ECU Tune – After installing a high-flow downpipe, a performance tune can optimize fuel and ignition settings for maximum gains.
- Legal Compliance – Some high-flow downpipes remove or modify catalytic converters, which may not be legal in all regions. Check local regulations before installation.
- Heat Management – Consider heat-wrapping the downpipe or using ceramic coatings to protect nearby components.
Final Thoughts
A downpipe upgrade can unlock the true potential of your Mercedes E63, delivering more power, faster response, and an aggressive exhaust note. Whether you perform the installation yourself or have a professional do it, the results are well worth the effort. By following the proper steps and using high-quality components, you’ll ensure your AMG runs at peak performance while enjoying the thrill of a transformed driving experience.